- The content in this article is limited to the features of BrightWork 365 Free. To access the Knowledge Base for the full BrightWork 365 paid product, click Home at the top of the screen.
- Click HERE to return to the BrightWork 365 Free - Knowledge Base home page.
For project-related status reporting, see also Project Status.
Home
The home page of BrightWork 365 Free provides links to pre-defined filtered reports, e.g., My Projects, All Projects, Not Started Projects.

On the lower section of the home page, you'll find a carousel of projects controlled by a drop-down list of pre-defined filters.

Click the left and right arrows to cycle through the project cards.

Projects

BrightWork 365 Free project reports (accessed from the Projects link on the main navigation) display high-level information about individual projects. View a defaulted view with clearly labeled fields and dropdown filters for project status, so you can quickly access and review relevant projects based on their progress and ownership. These reports are best for focusing on high-level details, but they also offer an easy way to drill down into very specific project information by clicking on various hyperlinks in each row.
The Projects link displays a report that includes the most important data about projects, with columns such as Project Status, Priority, % Complete, and Health. You can also use the view drop-down to further refine the report contents.
Default View
The Default view can be changed for the logged in user from All Projects to another view of their choosing at any time:
- Using the current view's drop-down list, select the view you would like to use as a default view.
- After the selected view loads on the screen, click the view drop-down.
- Click Set as default view.
Personal Views
In BrightWork 365 Free, a Personal View is a type of view that a user can create by themselves and customize specifically for their own needs and use within the app. Unlike system views, which are predefined and available to all users, personal views are unique to each individual user, although they can be shared with colleagues if desired.
Configure a Personal View
- Select the Projects link on the main navigation.
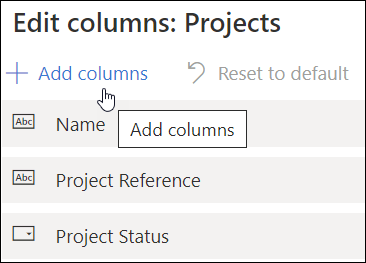
- Click Edit columns.

- Edit the columns:
- Reorder or remove columns using the ellipses that appears when you hover over an existing column name and click Apply.
Or, - To add new columns to the view: Click Add columns, select the column to add, click Close, reorder the column as necessary, and click Apply.
- Reorder or remove columns using the ellipses that appears when you hover over an existing column name and click Apply.
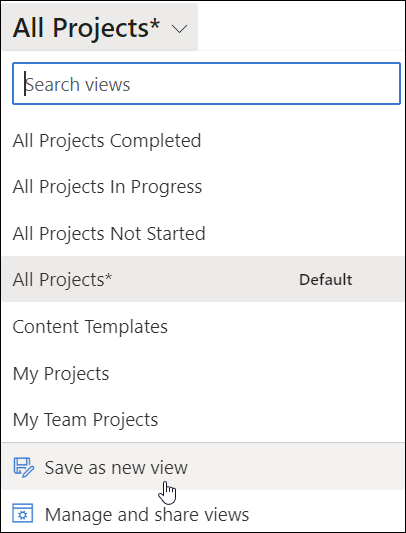
- If the view is only meant to be temporary, the process is complete. If you would like to permanently save the view as a personal view:
- In the view selector drop-down click Save as new view.
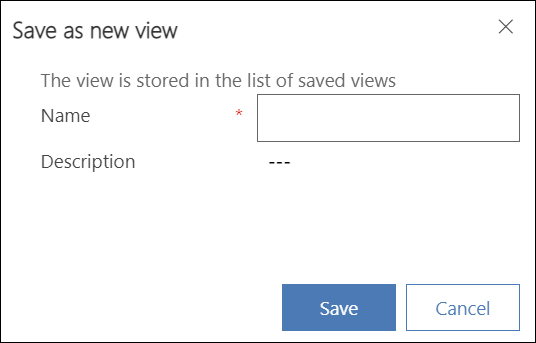
- Fill in the fields and click Save to save the view as a personal view.
- To share a personal view:
- In the view drop-down click Manage and share views.
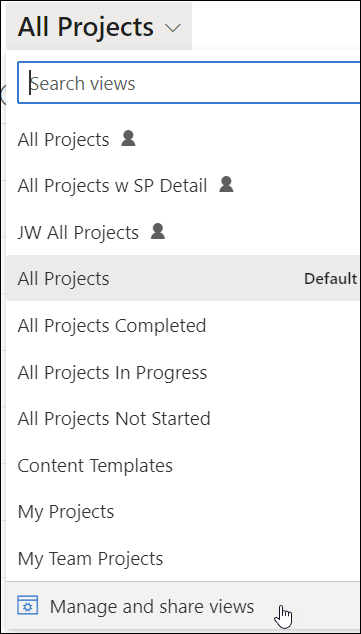
- Click on the ellipses next to the view you want to share and click Share.
- Search for and select the user or team you would like to share the personal view with.
- Assign permissions and click Share.
- In the view drop-down click Manage and share views.
- In the view selector drop-down click Save as new view.


