2026-2

Project Management Context
Not having a standard way to plan and manage projects is a common challenge among project managers. This is why adopting a configurable template approach from project selection to project close is crucial for success.
BrightWork 365 ships with customizable starter templates to give organizations a very fast starting point. Different situations call for different levels of structure and management. The templates described in this article are part of a process spectrum ranging from light to more formally structured.
BrightWork 365 brings the best of the Microsoft 365 ecosystem together providing a single solution that allows full control over project approval and starts your projects quickly with out-of-the-box project templates.
- Your organization may have guidelines or templates for
different project types, which will make this step simpler, as you
will be selecting a pre-defined approach and then perhaps tailoring
it.
- If you are unsure which project template would be the best fit for a particular initiative, think through how you intend to manage the project and how much project management rigor you will apply. BrightWork 365 can help alleviate any uncertainty that might remain regarding the template choice with the inclusion of the Form Configurator tool.
- With the Form Configurator you can begin with a middle-of-the-spectrum template such as Project Standard as a good compromise between using the lower project structure of the Project Light template, and the higher end of management complexity found in the Project Structured template. The different Tabs, Sections, and Columns that are hidden in Project Starter Templates can be turned on or off via the Form Configurator, giving you great flexibility with regard to project management process.
Project Template Summary
| Project Template | Associated Forms/Tabs |
| Project Tracker | Charter, Status, Team, Documents, Related |
| Project Light | Charter, Status, Team, Tasks, My Work, Documents, Project Settings, Approvals, Related |
| Project Standard | Charter, Status, Status Reports, Team, Tasks, My Work, Documents, Actions, Issues, Project Settings, Approvals, Related |
| Project Structured | Charter, Status, Status Reports, Team, Stages, Tasks, My Work, Documents, Actions, Issues, Risks, Costs, Lessons Learned, Communications, Project Settings, Approvals, Related |
| Product Update | Charter, Status, Status Reports, Team, Stages, Tasks, My Work, Documents, Actions, Issues, Risks, Costs, Lessons Learned, Communications, Project Settings, Approvals, Related |
| New Product Idea | Charter, Status, Status Reports, Team, Stages, Tasks, My Work, Documents, Actions, Issues, Risks, Costs, Communications, Project Settings, Approvals, Related |

All Templates
Templates that are associated with a Content Template will be prepopulated with project data.
- Document Management Interface: A SharePoint Online document interface will display throughout projects created with release 2025-2 or later, and if you're organization has opted into the Graph API settings (typically done during the installation process). Otherwise, the same document subgrid present on pre-2025-2 Projects will be displayed. See Document Management for details.
- User entered dates will be saved as time zone independent UTC dates, not user local dates; the same dates will be displayed for all users irrespective of time zone.
- Only the current project manager, or a user with the BrightWork PMO Manager security role, are considered owners of the project and can change who is listed as the project manager.
The elements below are common to all starter project templates except where noted:
Charter
The Charter tab contains high level metadata about the project, including the project title, stakeholder information, and a link to the associated Microsoft Teams Channel, if one has been configured for the project.
The following columns limit their user lookup values to the corresponding mapped BrightWork security role:
- Project Sponsor column mapped to BrightWork Team Member security role
- Project Manager column mapped to BrightWork Project Manager security role
The Charter tab also contains the mandatory columns Program and Portfolio. The values for these fields can later be changed by a user with elevated privileges, and all associated child items will be automatically adjusted to reflect these value changes.
When a Portfolio/Program value is changed, a process will run in the background to reconcile security access with these changes. When all the associated security changes have been completed and the portfolio/program move is done, an email notification will automatically be sent to the project manager and the user that initiated the change. If there is a process failure, an email notification will automatically be sent to the user that initiated the change, and the Flow owner.
The Project Tracker template has a simplified version of the Charter tab.
The following can be specified in Project Templates and will populate corresponding columns in new projects with these fields:
- Content Template
- Portfolio
- Program
- Project Manager: This value can only be changed in a project by the project's Actual Project Manager or a user with the BrightWork PMO Manager security role.
- Project Sponsor
- Project Type
Settings and Actions

The Settings and Actions field on the Charter tab provides project managers with a convenient method for viewing Global Calendar Settings and configuring project-specific calendar settings for flexible scheduling. BrightWork Team Members can view the settings, and the project's actual Project Manager (not project managers generally), and users with the BrightWork PMO or System Admin security role can edit the settings. These settings have a direct effect on the Gantt. See Settings and Actions for more information.
Status
The Project Tracker template has a simplified version of the Status tab, e.g., Start and End dates are manually updated and only the Health and Time manually-set indicators are present.
The Status tab allows the project manager to set current project metrics and KPIs.
See Project Status Reporting for more information.
Team
The Team tab automatically populates with the names of work item assignees, and the earliest start dates and latest finish dates across all the work assigned to them.
To manually add a team member that has not yet been automatically added from being assigned a work item, click + New Project Team Member.

Only a project's actual Project Manager and users with the BrightWork PMO Manager security role can add new team members to the Team tab directly.
If you would like to add multiple users to the Team tab at once rather than individually, you can add a task to the Gantt, add all resources to the single task, wait for the team members to be created in the Team tab, and then delete the task. Note that the task's Start & Finish dates will be present in the Team tab for these users.
Also see Project Security & Access for project security related info related to project team members.
You can audit various project team member related changes, including project access security related changes, by clicking on username > Related > Audit History.

- To manually delete a Project Team Member from the Team tab in a project, you will first need to remove the user from all work assignments in the project.
- Dates may not update in the Teams tab until an update of some kind is made in the Gantt tab, which will trigger the date update.
Tasks
The Tasks tab is not present in the Project Tracker template.
The Tasks tab contains two sub-tabs, Gantt and Grid.
Gantt
List of project tasks with a corresponding bar chart that represents the project schedule with task start and end dates. Visually depicts dependency relationships between the tasks as well as task status. For additional information see Tasks Gantt.
Users are given the option to access a French (Canada) version of Gantt through Personalization Settings > Formats tab.

Grid
The Grid provides a quick and easy method for users to enter project tasks and manage their Work Breakdown Structure independently while synchronizing it with the Gantt.
For additional information see Tasks Grid.
My Work
The My Work tab is not present in the Project Tracker template.
To view all work assigned to you within a project, click into the project's My Work tab. You can enter a specific piece of work by clicking on the Name of the assignment.

- Deleting a work item from My Work only deletes the assignment to the resource, not the underlying work item itself.
- If a work assignment has multiple assigned users and it is marked Complete by one of the assignees, an alert will be presented asking for confirmation of the status change.
- Parent tasks will be updated accordingly when its child tasks are set to Not Started or Complete in My Work.
- If an Issue, Cost or Action has a status of Cancelled or On Hold, then the user will not be able to mark the assignment as Complete/Not Started in My Work. They will need to manually go into the assignment and change the status.
- Filtering and sorting are not available on the Complete column. Sorting is not available on any calculated columns, e.g., Due Date.
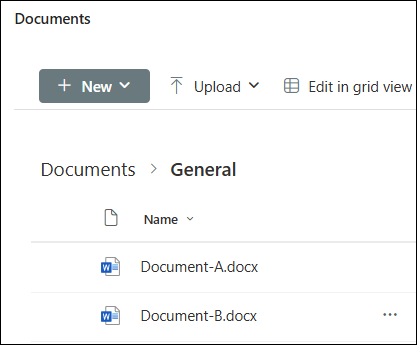
Documents
You can create new documents or upload existing documents in the Documents tab of a Project record.
See Document Management for details.
Document views will appear differently (not as a SharePoint subgrid) for projects created prior to BrightWork 365 version 2025-2.
Approval History
The Approval History tab includes a history of the approval process for each stage of the project's Business Process Flow.
- The Approval History tab is not relevant to the Project Tracker template because it does not have a project stage approval process.
- The Approvals History tab only displays if there is history available to display. Any project manager can view the tab when it is present.
Approvals
The Approvals tab is not present in the Project Tracker template.
The Approvals tab is only visible to users given the BrightWork Approvals Coordinator security role.
Approvals Coordinator is a lookup and security role - the nominated user must be chosen in the Approvals Coordinator field and also be given the BrightWork Approvals Coordinator security role. The Approvals Coordinator will be notified of approval process progress.
Business Process Flow Stages are used to control the number of stages and the stage names in the Approval sections of the Approvals tab. The default settings are controlled by the configuration set in Templates Area > Project Templates by a user given the BrightWork Template Editor security role.

See Project Stage Approval Process and BrightWork Approvals for related information.
Related > Audit History
The Related tab contains the Audit History link that allows you to view changes that were made throughout the project.
Project Tracker
The Project Tracker starter template is perfect for when you wish to start projects with a very simple tracker solution with the essentials of projects visible to senior executives, allowing them to learn status and decide which projects require additional attention.
For details about the elements present in the Project Tracker template, see the All Templates tab in this article.
- It is possible to enter Start and Finish dates in an incorrect order in Project Tracker, and as a result there would be a minus duration in the Portfolio and Projects Power BI reports.
- The Set Health Automatically setting found in Charter tab > Settings and Actions > Project Settings is present but not applicable to the Project Tracker template at this time.
- If "Send Stage for Approval" was activated in a project that has approval stages, and then the project's template is switched to Project Tracker, the Project Tracker project will temporarily be set to inactive, the approval flow will cancel automatically, and the user will receive an email informing of such.
Project Tracker > Settings and Actions
The following elements present in Project Tracker Settings and Actions are not relevant for the template:
- Settings tab: Default Scheduling Type, Set Health Automatically, Enable Gantt Virtual Scroll, Status Report Email fields.
- Calendar tab: Not relevant.
- Exception Days tab: Not relevant.
- Actions: Reset Target Dates, Copy to Content Template.
Deleting a Team Member from Project Tracker
- Click the Team tab and open the team member record.
- Delete any assignments the team member has.
- Delete the Team Member.
Deleting a Project After Switching its Template to Project Tracker
When deleting a project that has had its template changed to Project Tracker, you may be presented with the following message:

To remove the team members and assignments associated with the project and successfully delete the project, follow the instructions in article Delete Projects.
Project Light
The Project Light starter template is for managing projects that are at the low end of the complexity spectrum for projects that require small amounts of project management.
The Project Light template contains the elements found in the All Templates tab noted above.
Project Standard
The Project Standard starter template provides a semi-structured process that is useful for a range of business departments to run their projects including sales, marketing, engineering, finance, etc. This template is in the middle of the complexity spectrum.
The elements below are included in the Project Standard template:
Status Reports
The Status Reports tab provides the project manager with the ability to create snapshot status reports of the project's current standing and to view a history of status reports. See Project Status Reporting for details.
Actions
Log project actions, decisions, and changes. See Actions for details.
Issues
In the Issues section you can create a new issue by clicking + New Issue (do not use the Add Existing Issue option).
The list of available users to choose from in the Assigned To column is limited to those users given the BrightWork Team Member security role.
Issues can be added to the project's associated program or portfolio by clicking into the issue and choosing the relevant escalation location.

Project Structured
The Project Structured starter template is for managing projects that are at the higher end of the complexity spectrum.
The elements below are included in the Project Structured template:
Status Reports
The Status Reports tab provides the project manager with the ability to create snapshot status reports of the project's current standing and to view a history of status reports. See Project Status Reporting for details.
Stages
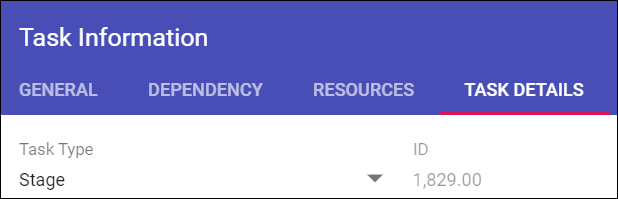
- Stages are automatically listed in the Stages tab after being created in the Gantt tab (a Gantt task can be set to be a Stage type task in Task Details). Manually adding stages from within the Stages section is not supported.
- The default sorting for the Stages list is by Current Start - Older to Newer.
- In the Stages section, the Current Stage column will match the current stage set in the Business Process Flow if the names of the stages in the Gantt match exactly with those in the Business Process Flow at the top of the project.
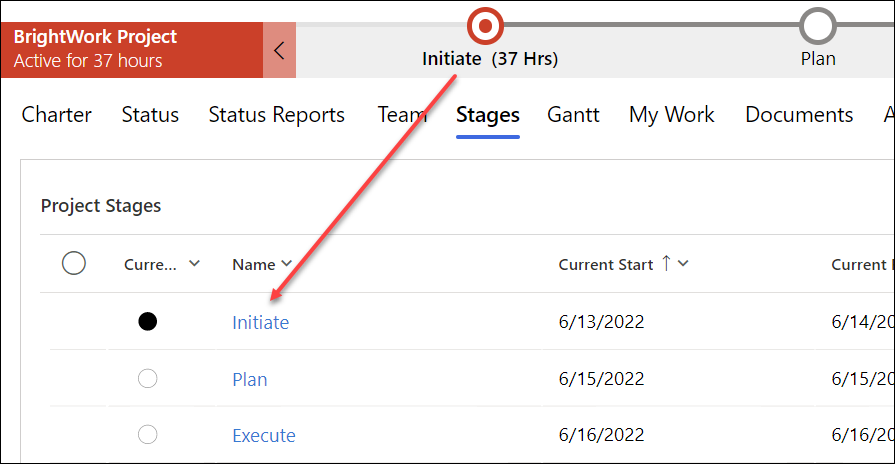
- The Current Stage detail values are tied to the progression of tasks within that Stage in the Gantt.

- You can view in the Stages tab the percentage complete of stages within projects in order to easily get a high-level view of how different stages are progressing.
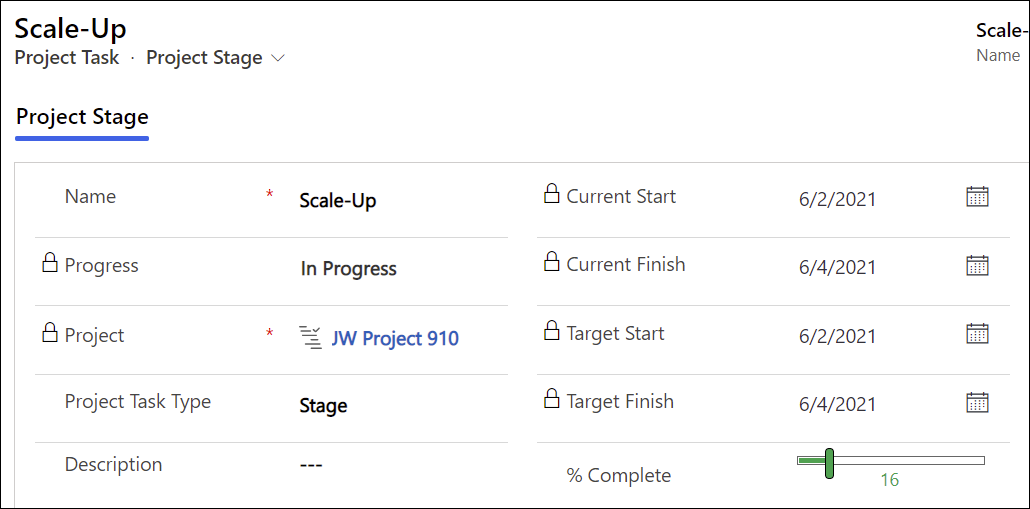
- Click on a stage link to view additional details about the stage including description and status information, and to access the document library associated with the project.


Actions
Log project actions, decisions, and changes. See Actions for details.
Issues
In the Issues section you can create a new issue by clicking + New Issue (do not use the Add Existing Issue option).
The list of available users to choose from in the Assigned To column is limited to those users given the BrightWork Team Member security role.
Issues can be added to the project's associated program or portfolio by clicking into the issue and choosing the relevant escalation location.
Risks
In the Risks section you can create a new risk by clicking + New Risk (do not use the Add Existing Risk option). Enter Risk information for those items identified as potential future issues, with probability, impact, status and other relevant Risk details.
The list of available users to choose from in the Assigned To column is limited to those users given the BrightWork Team Member security role.
- Risk Monitor: Person assigned overall responsibility for tracking the progress of a risk throughout its lifecycle.
- Mitigation Actions Assignee: Person responsible for taking steps to reduce the probability or impact of a risk to a project.
- Contingency Actions Assignee: Person responsible for implementing the actions required to mitigate any project impacts of a risk that has occurred.
Risks can be added to the project's associated program or portfolio by clicking into the risk and choosing the relevant escalation location.
Risk Status Values
- Identified
- Mitigated
- Occurred
- Managed
- Closed
Assignment Status Values
- Not Started
- In Progress
- Completed
Individual Mitigation Action Assignments and Contingency Action Assignments can be marked as Completed without the overall Risk Status being set to Closed.
See Risks for additional information.
Costs
The Costs tab provides a comprehensive method for capturing and tracking project budgets and actual costs at the project and individual item levels. See the Costs article for details.
Lessons Learned
Lessons Learned are documented insights, successes, failures, and recommendations captured from a project's experiences to improve future performance. They are a core component of project management and are typically collected during the Closing phase of (or iteratively throughout) the project.
Users add a new Lessons Learned item by clicking the + New Lesson Learned button in the Lessons Learned tab of a project. This will load the quick create form for Lessons Learned in the side panel.
Project Managers can delete any Lessons Learned item in any project they have access to, and the BrightWork PMO Manager can delete any Lessons Learned item. Team Members can only delete Lessons Learned items they have added themselves.
You can view Lessons Learned entries from across projects at the Program and Portfolio levels, where they can be grouped-by/sorted/filtered with attributes such as Category, Impact Outcome, and Project.
The following columns are available in the Lessons Learned tab:
Name
Enter a descriptive and unique title that summarizes the key takeaway of this lesson learned.
Logged By
Select your name or the name of the team member primarily responsible for documenting this lesson.
Category
Select the area this lesson primarily relates to, such as 'Business,' 'Project,' 'Team,' or 'Other.'
Description
Clearly describe what happened and the specific lesson that was derived from it.
Lesson Reference
This is a unique identifier used for tracking and referencing this specific lesson in reports.
Date Logged
Select the date this lesson was formally entered.
Impact Outcome
Select 'Positive' (Success), 'Negative' (Failure/Issue), or 'Neutral' (Observation) to classify the outcome.
Recommendation
The suggested change or action that should be taken.
Communications
Initiate and save project related Emails and Appointments directly in the BrightWork 365 app and save these items as well as Phone Call details and Notes, within associated projects. See the Communications article for details.
New Product Introduction
The New Product Introduction starter template relates to the submission of a new product and managing the delivery of the new product. This template is on the higher end of the project management process maturity scale.
The elements below are included in the New Product Introduction template:
Status Reports
The Status Reports tab provides the project manager with the ability to create snapshot status reports of the project's current standing and to view a history of status reports. See Project Status Reporting for details.
Stages
- Stages are automatically listed in the Stages tab after being created in the Gantt tab (a Gantt task can be set to be a Stage type task in Task Details). Manually adding stages from within the Stages section is not supported.
- The default sorting for the Stages list is by Current Start - Older to Newer.
- In the Stages section, the Current Stage column will match the current stage set in the Business Process Flow if the names of the stages in the Gantt match exactly with those in the Business Process Flow at the top of the project.
- The Current Stage detail values are tied to the progression of tasks within that Stage in the Gantt.
- You can view in the Stages tab the percentage complete of stages within projects in order to easily get a high-level view of how different stages are progressing.
- Click on a stage link to view additional details about the stage including description and status information, and to access the document library associated with the project.
Actions
Log project actions, decisions, and changes. See Actions for details.
Issues
In the Issues section you can create a new issue by clicking + New Issue (do not use the Add Existing Issue option).
The list of available users to choose from in the Assigned To column is limited to those users given the BrightWork Team Member security role.
Issues can be added to the project's associated program or portfolio by clicking into the issue and choosing the relevant escalation location.
Risks
In the Risks section you can create a new risk by clicking + New Risk (do not use the Add Existing Risk option). Enter Risk information for those items identified as potential future issues, with probability, impact, status and other relevant Risk details.
The list of available users to choose from in the Assigned To column is limited to those users given the BrightWork Team Member security role.
- Risk Monitor: Person assigned overall responsibility for tracking the progress of a risk throughout its lifecycle.
- Mitigation Actions Assignee: Person responsible for taking steps to reduce the probability or impact of a risk to a project.
- Contingency Actions Assignee: Person responsible for implementing the actions required to mitigate any project impacts of a risk that has occurred.
Risks can be added to the project's associated program or portfolio by clicking into the risk and choosing the relevant escalation location.
Risk Status Values
- Identified
- Mitigated
- Occurred
- Managed
- Closed
Assignment Status Values
- Not Started
- In Progress
- Completed
Individual Mitigation Action Assignments and Contingency Action Assignments can be marked as Completed without the overall Risk Status being set to Closed.
See Risks for additional information.
Costs
The Costs tab provides a comprehensive method for capturing and tracking project budgets and actual costs at the project and individual item levels. See the Costs article for details.
Communications
Initiate and save project related Emails and Appointments directly in the BrightWork 365 app and save these items as well as Phone Call details and Notes, within associated projects. See the Communications article for details.
Product Update
The Product Update starter template is typically used for projects related to updates of existing products or technologies, and for complex support issues. It follows a gated approach with approvals required to move from the Charter stage into Execution, and to close out the project.
The elements below are included in the Product Update template:
Group Manager Field
The list of users returned in the Group Manager drop-down field that is in the Charter tab of Product Update projects is limited to the users added to the Senior Managers Dynamics Team found in Admin Area | Dynamics Teams.

Location Field
The Location drop-down menu choices that are found in the Charter tab of the Product Update template are configured in Admin Area | Locations.

Status Reports
The Status Reports tab provides the project manager with the ability to create snapshot status reports of the project's current standing and to view a history of status reports. See Project Status Reporting for details.
Stages
- Stages are automatically listed in the Stages tab after being created in the Gantt tab (a Gantt task can be set to be a Stage type task in Task Details). Manually adding stages from within the Stages section is not supported.
- The default sorting for the Stages list is by Current Start - Older to Newer.
- In the Stages section, the Current Stage column will match the current stage set in the Business Process Flow if the names of the stages in the Gantt match exactly with those in the Business Process Flow at the top of the project.
- The Current Stage detail values are tied to the progression of tasks within that Stage in the Gantt.
- Click on a stage link to view additional details about the stage including description and status information, and to access the document library associated with the project.
Actions
Log project actions, decisions, and changes. See Actions for details.
Issues
In the Issues section you can create a new issue by clicking + New Issue (do not use the Add Existing Issue option).
The list of available users to choose from in the Assigned To column is limited to those users given the BrightWork Team Member security role.
Issues can be added to the project's associated program or portfolio by clicking into the issue and choosing the relevant escalation location.
Risks
In the Risks section you can create a new risk by clicking + New Risk (do not use the Add Existing Risk option). Enter Risk information for those items identified as potential future issues, with probability, impact, status and other relevant Risk details.
The list of available users to choose from in the Assigned To column is limited to those users given the BrightWork Team Member security role.
- Risk Monitor: Person assigned overall responsibility for tracking the progress of a risk throughout its lifecycle.
- Mitigation Actions Assignee: Person responsible for taking steps to reduce the probability or impact of a risk to a project.
- Contingency Actions Assignee: Person responsible for implementing the actions required to mitigate any project impacts of a risk that has occurred.
Risks can be added to the project's associated program or portfolio by clicking into the risk and choosing the relevant escalation location.
Risk Status Values
- Identified
- Mitigated
- Occurred
- Managed
- Closed
Assignment Status Values
- Not Started
- In Progress
- Completed
Individual Mitigation Action Assignments and Contingency Action Assignments can be marked as Completed without the overall Risk Status being set to Closed.
See Risks for additional information.
Costs
The Costs tab provides a comprehensive method for capturing and tracking project budgets and actual costs at the project and individual item levels. See the Costs article for details.
Lessons Learned
Lessons Learned are documented insights, successes, failures, and recommendations captured from a project's experiences to improve future performance. They are a core component of project management and are typically collected during the Closing phase of (or iteratively throughout) the project.
Users add a new Lessons Learned item by clicking the + New Lesson Learned button in the Lessons Learned tab of a project. This will load the quick create form for Lessons Learned in the side panel.
Project Managers can delete any Lessons Learned item in any project they have access to, and the BrightWork PMO Manager can delete any Lessons Learned item. Team Members can only delete Lessons Learned items they have added themselves.
You can view Lessons Learned entries from across projects at the Program and Portfolio levels, where they can be grouped-by/sorted/filtered with attributes such as Category, Impact Outcome, and Project.
The following columns are available in the Lessons Learned tab:
Name
Enter a descriptive and unique title that summarizes the key takeaway of this lesson learned.
Logged By
Select your name or the name of the team member primarily responsible for documenting this lesson.
Category
Select the area this lesson primarily relates to, such as 'Business,' 'Project,' 'Team,' or 'Other.'
Description
Clearly describe what happened and the specific lesson that was derived from it.
Lesson Reference
This is a unique identifier used for tracking and referencing this specific lesson in reports.
Date Logged
Select the date this lesson was formally entered.
Impact Outcome
Select 'Positive' (Success), 'Negative' (Failure/Issue), or 'Neutral' (Observation) to classify the outcome.
Recommendation
The suggested change or action that should be taken.
Communications
Initiate and save project related Emails and Appointments directly in the BrightWork 365 app and save these items as well as Phone Call details and Notes, within associated projects. See the Communications article for details.
2026-1
Project Management Context
Not having a standard way to plan and manage projects is a common challenge among project managers. This is why adopting a configurable template approach from project selection to project close is crucial for success.
BrightWork 365 ships with customizable templates to give organizations a very fast starting point. Different situations call for different levels of structure and management. The templates described in this article are part of a process spectrum ranging from light to more formally structured.
BrightWork 365 brings the best of the Microsoft 365 ecosystem together providing a single solution that allows full control over project approval and starts your projects quickly with out-of-the-box project templates.
BrightWork 365 comes with five starter project templates to help you get started managing projects quickly:
- The Project Light starter template is for managing projects that are at the low end of the complexity spectrum for projects that require small amounts of project management.
- The Project Standard starter template provides a semi-structured process that is useful for a range of business departments to run their projects including sales, marketing, engineering, finance, etc. This template is in the middle of the complexity spectrum.
- The Project Structured starter template is for managing projects that are at the higher end of the complexity spectrum.
- The New Product Introduction starter template relates to the submission of a new product and managing the delivery of the new product. This template is on the higher end of the project management process maturity scale.
- The Product Update starter template is typically used for projects related to updates of existing products or technologies, and for complex support issues. It follows a gated approach with approvals required to move from the Charter stage into Execution, and to close out the project.
- Your organization may have guidelines or templates for
different project types, which will make this step simpler, as you
will be selecting a pre-defined approach and then perhaps tailoring
it.
- If you are unsure which project template would be the best fit for a particular initiative, think through how you intend to manage the project and how much project management rigor you will apply. BrightWork 365 can help alleviate any uncertainty that might remain regarding the template choice with the inclusion of the Form Configurator tool.
- With the Form Configurator you can begin with a middle-of-the-spectrum template such as Project Standard as a good compromise between using the lower project structure of the Project Light template, and the higher end of management complexity found in the Project Structured template. The different Tabs, Sections, and Columns that are hidden in Project Starter Templates can be turned on or off via the Form Configurator, giving you great flexibility with regard to project management process.
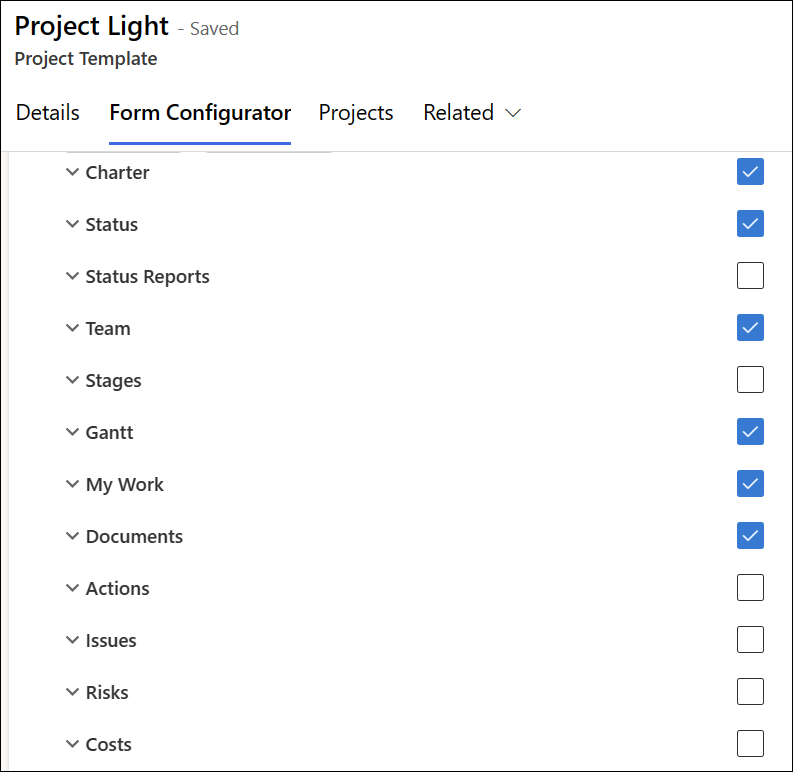 Form Configurator Screen
All Templates
Templates that are associated with a Content Template will be prepopulated with project data.
- Document Management Interface: A SharePoint Online document interface will display throughout projects created with release 2025-2 or later, and if you're organization has opted into the Graph API settings (typically done during the installation process). Otherwise, the same document subgrid present on pre-2025-2 Projects will be displayed. See Document Management for details.
- User entered dates will be saved as time zone independent UTC dates, not user local dates; the same dates will be displayed for all users irrespective of time zone.
- Only the current project manager, or a user with the BrightWork PMO Manager or System Administrator security role, are considered owners of the project and can change who is listed as the project manager.
The elements below are common to all starter project templates:
Charter
The Charter tab contains high level metadata about the project, including the project title, stakeholder information, and a link to the associated Microsoft Teams Channel, if one has been configured for the project.
The following columns limit their user lookup values to the corresponding mapped BrightWork security role:
- Project Sponsor column mapped to BrightWork Team Member security role
- Project Manager column mapped to BrightWork Project Manager security role
The Charter tab also contains the mandatory columns Program and Portfolio. The values for these fields can later be changed by a user with elevated privileges, and all associated child items will be automatically adjusted to reflect these value changes.
When a Portfolio/Program value is changed, a process will run in the background to reconcile security access with these changes. When all the associated security changes have been completed and the portfolio/program move is done, an email notification will automatically be sent to the project manager and the user that initiated the change. If there is a process failure, an email notification will automatically be sent to the user that initiated the change, and the Flow owner.
The following can be specified in Project Templates and will populate corresponding columns in new Projects:
- Content Template
- Portfolio
- Program
- Project Manager
- Project Sponsor
- Project Type
When the back arrow is clicked while on the Charter tab, the Project form will reload rather than load the view or record from which you opened the project record.
Schedule Settings

The Schedule Settings option on the Charter and Project Settings tabs provides project managers with a convenient method for viewing Global Calendar Settings and configuring project-specific calendar settings for flexible scheduling. See Schedule Settings for more information.
Status
The Status tab allows the project manager to set current project metrics and KPIs.
See Project Status Reporting for more information.
Team
The Team tab automatically populates with the names of work item assignees, and the earliest start dates and latest finish dates across all the work assigned to them.
To manually add a team member that has not yet been automatically added from being assigned a work item, click + New Project Team Member.
Only a project's actual Project Manager and users with the BrightWork PMO Manager security role can add new team members to the Team tab directly.
If you would like to add multiple users to the Team tab at once rather than individually, you can add a task to the Gantt, add all resources to the single task, wait for the team members to be created in the Team tab, and then delete the task. Note that the task's Start & Finish dates will be present in the Team tab for these users.
Also see Project Security & Access for project security related info related to project team members.
You can audit various project team member related changes, including project access security related changes, by clicking on username > Related > Audit History.
- To manually delete a Project Team Member from the Team tab in a project, you will first need to remove the user from all work assignments in the project.
- Dates may not update in the Teams tab until an update of some kind is made in the Gantt tab, which will trigger the date update.
Tasks
The Tasks tab contains two sub-tabs, Gantt and Grid.
Gantt
List of project tasks with a corresponding bar chart that represents the project schedule with task start and end dates. Visually depicts dependency relationships between the tasks as well as task status. For additional information see Tasks Gantt.
Users are given the option to access a French (Canada) version of Gantt through Personalization Settings > Formats tab.
Grid
The Grid provides a quick and easy method for users to enter project tasks and manage their Work Breakdown Structure independently while synchronizing it with the Gantt.
For additional information see Tasks Grid.
My Work
To view all work assigned to you within a project, click into the project's My Work tab. You can enter a specific piece of work by clicking on the Name of the assignment.

- Deleting a work item from My Work only deletes the assignment to the resource, not the underlying work item itself.
- If a work assignment has multiple assigned users and it is marked Complete by one of the assignees, an alert will be presented asking for confirmation of the status change.
- Parent tasks will be updated accordingly when its child tasks are set to Not Started or Complete in My Work.
- If an Issue, Cost or Action has a status of Cancelled or On Hold, then the user will not be able to mark the assignment as Complete/Not Started in My Work. They will need to manually go into the assignment and change the status.
- Filtering and sorting are not available on the Complete column. Sorting is not available on any calculated columns, i.e., Due Date.
Documents
You can create new documents or upload existing documents in the Documents tab of a Project record.
See Document Management for details.
Document views will appear differently (not as a SharePoint subgrid) for projects created prior to BrightWork 365 version 2025-2.
Project Settings
Only a project's actual project manager and users with the BrightWork PMO Manager or BrightWork Program Manager security role can access the Project Settings tab.
The Project Settings tab provides additional project information and gives the manager the ability to reset the target dates in all project tasks (baseline the schedule), and other administrative tasks.
Send Stage for Approval
If approval is required for a stage, the approval process will need to be started manually by the Project Manager by clicking the Send Stage for Approval button in the Project Settings tab. When a stage is sent for approval, some sections of the project will be made read-only, and a related message will display on the Charter tab. The Business Process Flow will not be disabled, but users will be prevented from moving a stage forward or backward.

Approval History
The Approval History section of the Project Settings tab includes a history of the approval process for each stage of the Business Process Flow.
Schedule Settings
The Schedule Settings option on the Charter tab and Project Settings tab provides project managers with a convenient method for configuring multiple project-specific options including calendar settings, overriding global calendar settings which will adjust the project schedule accordingly. See Schedule Settings for more information.
Approvals
The Approvals tab is only visible to users given the BrightWork Approvals Coordinator security role.
Approvals Coordinator is a lookup and security role - the nominated user must be chosen in the Approvals Coordinator field and also be given the BrightWork Approvals Coordinator security role. The Approvals Coordinator will be notified of approval process progress.
Business Process Flow Stages are used to control the number of stages and the stage names in the Approval sections of the Approvals tab. The default settings are controlled by the configuration set in Templates Area > Project Templates by a user given the BrightWork Template Editor security role.
See Project Stage Approval Process and BrightWork Approvals for related information.
Related > Audit History
The Related tab contains the Audit History link that allows you to view changes that were made throughout the project.
Project Light
Project Light includes all the tabs noted in "All Templates" and the Business Process Flow below:
Business Process Flow

Project Standard
The additional elements below are included in the Project Standard template:
Business Process Flow & Tabs

Status Reports
The Status Reports tab provides the project manager with the ability to create snapshot status reports of the project's current standing and to view a history of status reports. See Project Status Reporting for details.
Actions
Log project actions, decisions, and changes. See Actions for details.
Issues
In the Issues section you can create a new issue by clicking + New Issue (do not use the Add Existing Issue option).
The list of available users to choose from in the Assigned To column is limited to those users given the BrightWork Team Member security role.
Issues can be added to the project's associated program or portfolio by clicking into the issue and choosing the relevant escalation location.
Project Structured
The additional elements below are included in the Project Structured template:
Business Process Flow & Tabs

Status Reports
The Status Reports tab provides the project manager with the ability to create snapshot status reports of the project's current standing and to view a history of status reports. See Project Status Reporting for details.
Stages
- Stages are automatically listed in the Stages tab after being created in the Gantt tab (a Gantt task can be set to be a Stage type task in Task Details). Manually adding stages from within the Stages section is not supported.
- The default sorting for the Stages list is by Current Start - Older to Newer.
- In the Stages section, the Current Stage column will match the current stage set in the Business Process Flow if the names of the stages in the Gantt match exactly with those in the Business Process Flow at the top of the project.
- The Current Stage detail values are tied to the progression of tasks within that Stage in the Gantt.
- You can view in the Stages tab the percentage complete of stages within projects in order to easily get a high-level view of how different stages are progressing.
- Click on a stage link to view additional details about the stage including description and status information, and to access the document library associated with the project.
Actions
Log project actions, decisions, and changes. See Actions for details.
Issues
In the Issues section you can create a new issue by clicking + New Issue (do not use the Add Existing Issue option).
The list of available users to choose from in the Assigned To column is limited to those users given the BrightWork Team Member security role.
Issues can be added to the project's associated program or portfolio by clicking into the issue and choosing the relevant escalation location.
Risks
In the Risks section you can create a new risk by clicking + New Risk (do not use the Add Existing Risk option). Enter Risk information for those items identified as potential future issues, with probability, impact, status and other relevant Risk details.
The list of available users to choose from in the Assigned To column is limited to those users given the BrightWork Team Member security role.
- Risk Monitor: Person assigned overall responsibility for tracking the progress of a risk throughout its lifecycle.
- Mitigation Actions Assignee: Person responsible for taking steps to reduce the probability or impact of a risk to a project.
- Contingency Actions Assignee: Person responsible for implementing the actions required to mitigate any project impacts of a risk that has occurred.
Risks can be added to the project's associated program or portfolio by clicking into the risk and choosing the relevant escalation location.
Risk Status Values
- Identified
- Mitigated
- Occurred
- Managed
- Closed
Assignment Status Values
- Not Started
- In Progress
- Completed
Individual Mitigation Action Assignments and Contingency Action Assignments can be marked as Completed without the overall Risk Status being set to Closed.
See Risks for additional information.
Costs
The Costs tab provides a comprehensive method for capturing and tracking project budgets and actual costs at the project and individual item levels. See the Costs article for details.
Lessons Learned
Lessons Learned are documented insights, successes, failures, and recommendations captured from a project's experiences to improve future performance. They are a core component of project management and are typically collected during the Closing phase of (or iteratively throughout) the project.
Users add a new Lessons Learned item by clicking the + New Lesson Learned button in the Lessons Learned tab of a project. This will load the quick create form for Lessons Learned in the side panel.
Project Managers can delete any Lessons Learned item in any project they have access to, and the BrightWork PMO Manager can delete any Lessons Learned item. Team Members can only delete Lessons Learned items they have added themselves.
You can view Lessons Learned entries from across projects at the Program and Portfolio levels, where they can be grouped-by/sorted/filtered with attributes such as Category, Impact Outcome, and Project.
The following columns are available in the Lessons Learned tab:
Name
Enter a descriptive and unique title that summarizes the key takeaway of this lesson learned.
Logged By
Select your name or the name of the team member primarily responsible for documenting this lesson.
Category
Select the area this lesson primarily relates to, such as 'Business,' 'Project,' 'Team,' or 'Other.'
Description
Clearly describe what happened and the specific lesson that was derived from it.
Lesson Reference
This is a unique identifier used for tracking and referencing this specific lesson in reports.
Date Logged
Select the date this lesson was formally entered.
Impact Outcome
Select 'Positive' (Success), 'Negative' (Failure/Issue), or 'Neutral' (Observation) to classify the outcome.
Recommendation
The suggested change or action that should be taken.
Communications
Initiate and save project related Emails and Appointments directly in the BrightWork 365 app and save these items as well as Phone Call details and Notes, within associated projects. See the Communications article for details.
New Product Introduction
The additional elements below are included in the New Product Introduction template:
Business Process Flow & Tabs

Status Reports
The Status Reports tab provides the project manager with the ability to create snapshot status reports of the project's current standing and to view a history of status reports. See Project Status Reporting for details.
Stages
- Stages are automatically listed in the Stages tab after being created in the Gantt tab (a Gantt task can be set to be a Stage type task in Task Details). Manually adding stages from within the Stages section is not supported.
- The default sorting for the Stages list is by Current Start - Older to Newer.
- In the Stages section, the Current Stage column will match the current stage set in the Business Process Flow if the names of the stages in the Gantt match exactly with those in the Business Process Flow at the top of the project.
- The Current Stage detail values are tied to the progression of tasks within that Stage in the Gantt.
- You can view in the Stages tab the percentage complete of stages within projects in order to easily get a high-level view of how different stages are progressing.
- Click on a stage link to view additional details about the stage including description and status information, and to access the document library associated with the project.
Actions
Log project actions, decisions, and changes. See Actions for details.
Issues
In the Issues section you can create a new issue by clicking + New Issue (do not use the Add Existing Issue option).
The list of available users to choose from in the Assigned To column is limited to those users given the BrightWork Team Member security role.
Issues can be added to the project's associated program or portfolio by clicking into the issue and choosing the relevant escalation location.
Risks
In the Risks section you can create a new risk by clicking + New Risk (do not use the Add Existing Risk option). Enter Risk information for those items identified as potential future issues, with probability, impact, status and other relevant Risk details.
The list of available users to choose from in the Assigned To column is limited to those users given the BrightWork Team Member security role.
- Risk Monitor: Person assigned overall responsibility for tracking the progress of a risk throughout its lifecycle.
- Mitigation Actions Assignee: Person responsible for taking steps to reduce the probability or impact of a risk to a project.
- Contingency Actions Assignee: Person responsible for implementing the actions required to mitigate any project impacts of a risk that has occurred.
Risks can be added to the project's associated program or portfolio by clicking into the risk and choosing the relevant escalation location.
Risk Status Values
- Identified
- Mitigated
- Occurred
- Managed
- Closed
Assignment Status Values
- Not Started
- In Progress
- Completed
Individual Mitigation Action Assignments and Contingency Action Assignments can be marked as Completed without the overall Risk Status being set to Closed.
See Risks for additional information.
Costs
The Costs tab provides a comprehensive method for capturing and tracking project budgets and actual costs at the project and individual item levels. See the Costs article for details.
Communications
Initiate and save project related Emails and Appointments directly in the BrightWork 365 app and save these items as well as Phone Call details and Notes, within associated projects. See the Communications article for details.
Product Update
The additional elements below are included in the Product Update template:
Business Process Flow & Tabs

Group Manager Field
The list of users returned in the Group Manager drop-down field that is in the Charter tab of Product Update projects is limited to the users added to the Senior Managers Dynamics Team found in Admin Area | Dynamics Teams.
Location Field
The Location drop-down menu choices that are found in the Charter tab of the Product Update template are configured in Admin Area | Locations.
Status Reports
The Status Reports tab provides the project manager with the ability to create snapshot status reports of the project's current standing and to view a history of status reports. See Project Status Reporting for details.
Stages
- Stages are automatically listed in the Stages tab after being created in the Gantt tab (a Gantt task can be set to be a Stage type task in Task Details). Manually adding stages from within the Stages section is not supported.
- The default sorting for the Stages list is by Current Start - Older to Newer.
- In the Stages section, the Current Stage column will match the current stage set in the Business Process Flow if the names of the stages in the Gantt match exactly with those in the Business Process Flow at the top of the project.
- The Current Stage detail values are tied to the progression of tasks within that Stage in the Gantt.
- Click on a stage link to view additional details about the stage including description and status information, and to access the document library associated with the project.
Actions
Log project actions, decisions, and changes. See Actions for details.
Issues
In the Issues section you can create a new issue by clicking + New Issue (do not use the Add Existing Issue option).
The list of available users to choose from in the Assigned To column is limited to those users given the BrightWork Team Member security role.
Issues can be added to the project's associated program or portfolio by clicking into the issue and choosing the relevant escalation location.
Risks
In the Risks section you can create a new risk by clicking + New Risk (do not use the Add Existing Risk option). Enter Risk information for those items identified as potential future issues, with probability, impact, status and other relevant Risk details.
The list of available users to choose from in the Assigned To column is limited to those users given the BrightWork Team Member security role.
- Risk Monitor: Person assigned overall responsibility for tracking the progress of a risk throughout its lifecycle.
- Mitigation Actions Assignee: Person responsible for taking steps to reduce the probability or impact of a risk to a project.
- Contingency Actions Assignee: Person responsible for implementing the actions required to mitigate any project impacts of a risk that has occurred.
Risks can be added to the project's associated program or portfolio by clicking into the risk and choosing the relevant escalation location.
Risk Status Values
- Identified
- Mitigated
- Occurred
- Managed
- Closed
Assignment Status Values
- Not Started
- In Progress
- Completed
Individual Mitigation Action Assignments and Contingency Action Assignments can be marked as Completed without the overall Risk Status being set to Closed.
See Risks for additional information.
Costs
The Costs tab provides a comprehensive method for capturing and tracking project budgets and actual costs at the project and individual item levels. See the Costs article for details.
Lessons Learned
Lessons Learned are documented insights, successes, failures, and recommendations captured from a project's experiences to improve future performance. They are a core component of project management and are typically collected during the Closing phase of (or iteratively throughout) the project.
Users add a new Lessons Learned item by clicking the + New Lesson Learned button in the Lessons Learned tab of a project. This will load the quick create form for Lessons Learned in the side panel.
Project Managers can delete any Lessons Learned item in any project they have access to, and the BrightWork PMO Manager can delete any Lessons Learned item. Team Members can only delete Lessons Learned items they have added themselves.
You can view Lessons Learned entries from across projects at the Program and Portfolio levels, where they can be grouped-by/sorted/filtered with attributes such as Category, Impact Outcome, and Project.
The following columns are available in the Lessons Learned tab:
Name
Enter a descriptive and unique title that summarizes the key takeaway of this lesson learned.
Logged By
Select your name or the name of the team member primarily responsible for documenting this lesson.
Category
Select the area this lesson primarily relates to, such as 'Business,' 'Project,' 'Team,' or 'Other.'
Description
Clearly describe what happened and the specific lesson that was derived from it.
Lesson Reference
This is a unique identifier used for tracking and referencing this specific lesson in reports.
Date Logged
Select the date this lesson was formally entered.
Impact Outcome
Select 'Positive' (Success), 'Negative' (Failure/Issue), or 'Neutral' (Observation) to classify the outcome.
Recommendation
The suggested change or action that should be taken.
Communications
Initiate and save project related Emails and Appointments directly in the BrightWork 365 app and save these items as well as Phone Call details and Notes, within associated projects. See the Communications article for details.
2025-2
Project Management Context
Not having a standard way to plan and manage projects is a common challenge among project managers. This is why adopting a configurable template approach from project selection to project close is crucial for success.
BrightWork 365 ships with customizable templates to give organizations a very fast starting point. Different situations call for different levels of structure and management. The templates described in this article are part of a process spectrum ranging from light to more formally structured.
BrightWork 365 brings the best of the Microsoft 365 ecosystem together providing a single solution that allows full control over project approval and starts your projects quickly with out-of-the-box project templates.
BrightWork 365 comes with five starter project templates to help you get started managing projects quickly:
- The Project Light starter template is for managing projects that are at the low end of the complexity spectrum for projects that require small amounts of project management.
- The Project Standard starter template provides a semi-structured process that is useful for a range of business departments to run their projects including sales, marketing, engineering, finance, etc. This template is in the middle of the complexity spectrum.
- The Project Structured starter template is for managing projects that are at the higher end of the complexity spectrum.
- The New Product Introduction starter template relates to the submission of a new product and managing the delivery of the new product. This template is on the higher end of the project management process maturity scale.
- The Product Update starter template is typically used for projects related to updates of existing products or technologies, and for complex support issues. It follows a gated approach with approvals required to move from the Charter stage into Execution, and to close out the project.
- Your organization may have guidelines or templates for
different project types, which will make this step simpler, as you
will be selecting a pre-defined approach and then perhaps tailoring
it.
- If you are unsure which project template would be the best fit for a particular initiative, think through how you intend to manage the project and how much project management rigor you will apply. BrightWork 365 can help alleviate any uncertainty that might remain regarding the template choice with the inclusion of the Form Configurator tool.
- With the Form Configurator you can begin with a middle-of-the-spectrum template such as Project Standard as a good compromise between using the lower project structure of the Project Light template, and the higher end of management complexity found in the Project Structured template. The different Tabs, Sections, and Columns that are hidden in Project Starter Templates can be turned on or off via the Form Configurator, giving you great flexibility with regard to project management process.
Form Configurator ScreenAll Templates
Templates that are associated with a Content Template will be prepopulated with project data.
- Document Management Interface: A SharePoint Online document interface will display throughout projects created with release 2025-2 or later, and if you're organization has opted into the Graph API settings (typically done during the installation process). Otherwise, the same document subgrid present on pre-2025-2 Projects will be displayed. See Document Management for details.
- User entered dates will be saved as time zone independent UTC dates, not user local dates; the same dates will be displayed for all users irrespective of time zone.
- Only the current project manager, or a user with the BrightWork PMO Manager or System Administrator security role, are considered owners of the project and can change who is listed as the project manager.
The elements below are common to all starter project templates:
Charter
The Charter tab contains high level metadata about the project, including the project title, stakeholder information, and a link to the associated Microsoft Teams Channel, if one has been configured for the project.
The following columns limit their user lookup values to the corresponding mapped BrightWork security role:
- Project Sponsor column mapped to BrightWork Team Member security role
- Project Manager column mapped to BrightWork Project Manager security role
The Charter tab also contains the mandatory columns Program and Portfolio. The values for these fields can later be changed by a user with elevated privileges, and all associated child items will be automatically adjusted to reflect these value changes.
When a Portfolio/Program value is changed, a process will run in the background to reconcile security access with these changes. When all the associated security changes have been completed and the portfolio/program move is done, an email notification will automatically be sent to the project manager and the user that initiated the change. If there is a process failure, an email notification will automatically be sent to the user that initiated the change, and the Flow owner.
The following can be specified in Project Templates and will populate corresponding columns in new Projects:
- Content Template
- Portfolio
- Program
- Project Manager
- Project Sponsor
- Project Type
When the back arrow is clicked while on the Charter tab, the Project form will reload rather than load the view or record from which you opened the project record.
Schedule Settings
The Schedule Settings option on the Charter and Project Settings tabs provides project managers with a convenient method for viewing Global Calendar Settings and configuring project-specific calendar settings for flexible scheduling. See Schedule Settings for more information.
Status
The Status tab allows the project manager to set current project metrics and KPIs.
See Project Status Reporting for more information.
Team
The Team tab automatically populates with the names of work item assignees, and the earliest start dates and latest finish dates across all the work assigned to them.
To manually add a team member that has not yet been automatically added from being assigned a work item, click + New Project Team Member.
Only a project's actual Project Manager and users with the BrightWork PMO Manager security role can add new team members to the Team tab directly.
If you would like to add multiple users to the Team tab at once rather than individually, you can add a task to the Gantt, add all resources to the single task, wait for the team members to be created in the Team tab, and then delete the task. Note that the task's Start & Finish dates will be present in the Team tab for these users.
Also see Project Security & Access for project security related info related to project team members.
You can audit various project team member related changes, including project access security related changes, by clicking on username > Related > Audit History.
- To manually delete a Project Team Member from the Team tab in a project, you will first need to remove the user from all work assignments in the project.
- Dates may not update in the Teams tab until an update of some kind is made in the Gantt tab, which will trigger the date update.
Gantt
List of project tasks with a corresponding bar chart that represents the project schedule with task start and end dates. Visually depicts dependency relationships between the tasks as well as task status. See the Task Management article for more information.
Users are given the option to access a French (Canada) version of Gantt through Personalization Settings > Formats tab.
My Work
To view all work assigned to you within a project, click into the project's My Work tab. You can enter a specific piece of work by clicking on the Name of the assignment.

- Deleting a work item from My Work only deletes the assignment to the resource, not the underlying work item itself.
- If a work assignment has multiple assigned users and it is marked Complete by one of the assignees, an alert will be presented asking for confirmation of the status change.
- Parent tasks will be updated accordingly when its child tasks are set to Not Started or Complete in My Work.
- If an Issue, Cost or Action has a status of Cancelled or On Hold, then the user will not be able to mark the assignment as Complete/Not Started in My Work. They will need to manually go into the assignment and change the status.
- Filtering and sorting are not available on the Complete column. Sorting is not available on any calculated columns, i.e., Due Date.
Documents
You can create new documents or upload existing documents in the Documents tab of a Project record.
See Document Management for details.
Document views will appear differently (not as a SharePoint subgrid) for projects created prior to BrightWork 365 version 2025-2.
Project Settings
Only a project's actual project manager and users with the BrightWork PMO Manager or BrightWork Program Manager security role can access the Project Settings tab.
The Project Settings tab provides additional project information and gives the manager the ability to reset the target dates in all project tasks (baseline the schedule), and other administrative tasks.
Send Stage for Approval
If approval is required for a stage, the approval process will need to be started manually by the Project Manager by clicking the Send Stage for Approval button in the Project Settings tab. When a stage is sent for approval, some sections of the project will be made read-only, and a related message will display on the Charter tab. The Business Process Flow will not be disabled, but users will be prevented from moving a stage forward or backward.
Approval History
The Approval History section of the Project Settings tab includes a history of the approval process for each stage of the Business Process Flow.
Schedule Settings
The Schedule Settings option on the Charter tab and Project Settings tab provides project managers with a convenient method for configuring multiple project-specific options including calendar settings, overriding global calendar settings which will adjust the project schedule accordingly. See Schedule Settings for more information.
Approvals
The Approvals tab is only visible to users given the BrightWork Approvals Coordinator security role.
Approvals Coordinator is a lookup and security role - the nominated user must be chosen in the Approvals Coordinator field and also be given the BrightWork Approvals Coordinator security role. The Approvals Coordinator will be notified of approval process progress.
Business Process Flow Stages are used to control the number of stages and the stage names in the Approval sections of the Approvals tab. The default settings are controlled by the configuration set in Templates Area > Project Templates by a user given the BrightWork Template Editor security role.
See Project Stage Approval Process and BrightWork Approvals for related information.
Related > Audit History
The Related tab contains the Audit History link that allows you to view changes that were made throughout the project.

Project Light
The elements below are included in the Project Light template:
Business Process Flow & Tabs


Project Standard
The elements below are included in the Project Standard template:
Business Process Flow & Tabs

Status Reports
The Status Reports tab provides the project manager with the ability to create snapshot status reports of the project's current standing and to view a history of status reports. See Project Status Reporting for details.
Actions
Log project actions, decisions, and changes. See Actions for details.
Issues
In the Issues section you can create a new issue by clicking + New Issue (do not use the Add Existing Issue option).
The list of available users to choose from in the Assigned To column is limited to those users given the BrightWork Team Member security role.
Issues can be added to the project's associated program or portfolio by clicking into the issue and choosing the relevant escalation location.
Project Structured
The elements below are included in the Project Structured template:
Business Process Flow & Tabs

Status Reports
The Status Reports tab provides the project manager with the ability to create snapshot status reports of the project's current standing and to view a history of status reports. See Project Status Reporting for details.
Stages
- Stages are automatically listed in the Stages tab after being created in the Gantt tab (a Gantt task can be set to be a Stage type task in Task Details). Manually adding stages from within the Stages section is not supported.
- The default sorting for the Stages list is by Current Start - Older to Newer.
- In the Stages section, the Current Stage column will match the current stage set in the Business Process Flow if the names of the stages in the Gantt match exactly with those in the Business Process Flow at the top of the project.
- The Current Stage detail values are tied to the progression of tasks within that Stage in the Gantt.
- You can view in the Stages tab the percentage complete of stages within projects in order to easily get a high-level view of how different stages are progressing.
- Click on a stage link to view additional details about the stage including description and status information, and to access the document library associated with the project.
Actions
Log project actions, decisions, and changes. See Actions for details.
Issues
In the Issues section you can create a new issue by clicking + New Issue (do not use the Add Existing Issue option).
The list of available users to choose from in the Assigned To column is limited to those users given the BrightWork Team Member security role.
Issues can be added to the project's associated program or portfolio by clicking into the issue and choosing the relevant escalation location.
Risks
In the Risks section you can create a new risk by clicking + New Risk (do not use the Add Existing Risk option). Enter Risk information for those items identified as potential future issues, with probability, impact, status and other relevant Risk details.
The list of available users to choose from in the Assigned To column is limited to those users given the BrightWork Team Member security role.
- Risk Monitor: Person assigned overall responsibility for tracking the progress of a risk throughout its lifecycle.
- Mitigation Actions Assignee: Person responsible for taking steps to reduce the probability or impact of a risk to a project.
- Contingency Actions Assignee: Person responsible for implementing the actions required to mitigate any project impacts of a risk that has occurred.
Risks can be added to the project's associated program or portfolio by clicking into the risk and choosing the relevant escalation location.
Risk Status Values
- Identified
- Mitigated
- Occurred
- Managed
- Closed
Assignment Status Values
- Not Started
- In Progress
- Completed
Individual Mitigation Action Assignments and Contingency Action Assignments can be marked as Completed without the overall Risk Status being set to Closed.
See Risks for additional information.
Costs
The Costs tab provides a comprehensive method for capturing and tracking project budgets and actual costs at the project and individual item levels. See the Costs article for details.
Communications
Initiate and save project related Emails and Appointments directly in the BrightWork 365 app and save these items as well as Phone Call details and Notes, within associated projects. See the Communications article for details.
New Product Introduction
The elements below are included in the New Product Introduction template:
Business Process Flow & Tabs

Status Reports
The Status Reports tab provides the project manager with the ability to create snapshot status reports of the project's current standing and to view a history of status reports. See Project Status Reporting for details.
Stages
- Stages are automatically listed in the Stages tab after being created in the Gantt tab (a Gantt task can be set to be a Stage type task in Task Details). Manually adding stages from within the Stages section is not supported.
- The default sorting for the Stages list is by Current Start - Older to Newer.
- In the Stages section, the Current Stage column will match the current stage set in the Business Process Flow if the names of the stages in the Gantt match exactly with those in the Business Process Flow at the top of the project.
- The Current Stage detail values are tied to the progression of tasks within that Stage in the Gantt.
- You can view in the Stages tab the percentage complete of stages within projects in order to easily get a high-level view of how different stages are progressing.
- Click on a stage link to view additional details about the stage including description and status information, and to access the document library associated with the project.
Actions
Log project actions, decisions, and changes. See Actions for details.
Issues
In the Issues section you can create a new issue by clicking + New Issue (do not use the Add Existing Issue option).
The list of available users to choose from in the Assigned To column is limited to those users given the BrightWork Team Member security role.
Issues can be added to the project's associated program or portfolio by clicking into the issue and choosing the relevant escalation location.
Risks
In the Risks section you can create a new risk by clicking + New Risk (do not use the Add Existing Risk option). Enter Risk information for those items identified as potential future issues, with probability, impact, status and other relevant Risk details.
The list of available users to choose from in the Assigned To column is limited to those users given the BrightWork Team Member security role.
- Risk Monitor: Person assigned overall responsibility for tracking the progress of a risk throughout its lifecycle.
- Mitigation Actions Assignee: Person responsible for taking steps to reduce the probability or impact of a risk to a project.
- Contingency Actions Assignee: Person responsible for implementing the actions required to mitigate any project impacts of a risk that has occurred.
Risks can be added to the project's associated program or portfolio by clicking into the risk and choosing the relevant escalation location.
Risk Status Values
- Identified
- Mitigated
- Occurred
- Managed
- Closed
Assignment Status Values
- Not Started
- In Progress
- Completed
Individual Mitigation Action Assignments and Contingency Action Assignments can be marked as Completed without the overall Risk Status being set to Closed.
See Risks for additional information.
Costs
The Costs tab provides a comprehensive method for capturing and tracking project budgets and actual costs at the project and individual item levels. See the Costs article for details.
Communications
Initiate and save project related Emails and Appointments directly in the BrightWork 365 app and save these items as well as Phone Call details and Notes, within associated projects. See the Communications article for details.
Product Update
The Product Update starter template is typically used for projects related to updates of existing products or technologies, and for complex support issues. It follows a gated approach with approvals required to move from the Charter stage into Execution, and to close out the project.
The elements below are included in the Product Update template:
Business Process Flow & Tabs

Group Manager Field
The list of users returned in the Group Manager drop-down field that is in the Charter tab of Product Update projects is limited to the users added to the Senior Managers Dynamics Team found in Admin Area | Dynamics Teams.
Location Field
The Location drop-down menu choices that are found in the Charter tab of the Product Update template are configured in Admin Area | Locations.
Status Reports
The Status Reports tab provides the project manager with the ability to create snapshot status reports of the project's current standing and to view a history of status reports. See Project Status Reporting for details.
Stages
- Stages are automatically listed in the Stages tab after being created in the Gantt tab (a Gantt task can be set to be a Stage type task in Task Details). Manually adding stages from within the Stages section is not supported.
- The default sorting for the Stages list is by Current Start - Older to Newer.
- In the Stages section, the Current Stage column will match the current stage set in the Business Process Flow if the names of the stages in the Gantt match exactly with those in the Business Process Flow at the top of the project.
- The Current Stage detail values are tied to the progression of tasks within that Stage in the Gantt.
- Click on a stage link to view additional details about the stage including description and status information, and to access the document library associated with the project.
Actions
Log project actions, decisions, and changes. See Actions for details.
Issues
In the Issues section you can create a new issue by clicking + New Issue (do not use the Add Existing Issue option).
The list of available users to choose from in the Assigned To column is limited to those users given the BrightWork Team Member security role.
Issues can be added to the project's associated program or portfolio by clicking into the issue and choosing the relevant escalation location.
Risks
In the Risks section you can create a new risk by clicking + New Risk (do not use the Add Existing Risk option). Enter Risk information for those items identified as potential future issues, with probability, impact, status and other relevant Risk details.
The list of available users to choose from in the Assigned To column is limited to those users given the BrightWork Team Member security role.
- Risk Monitor: Person assigned overall responsibility for tracking the progress of a risk throughout its lifecycle.
- Mitigation Actions Assignee: Person responsible for taking steps to reduce the probability or impact of a risk to a project.
- Contingency Actions Assignee: Person responsible for implementing the actions required to mitigate any project impacts of a risk that has occurred.
Risks can be added to the project's associated program or portfolio by clicking into the risk and choosing the relevant escalation location.
Risk Status Values
- Identified
- Mitigated
- Occurred
- Managed
- Closed
Assignment Status Values
- Not Started
- In Progress
- Completed
Individual Mitigation Action Assignments and Contingency Action Assignments can be marked as Completed without the overall Risk Status being set to Closed.
See Risks for additional information.
Costs
The Costs tab provides a comprehensive method for capturing and tracking project budgets and actual costs at the project and individual item levels. See the Costs article for details.
Communications
Initiate and save project related Emails and Appointments directly in the BrightWork 365 app and save these items as well as Phone Call details and Notes, within associated projects. See the Communications article for details.
