- Be sure to first read the Customization Notes article.
- If your solution has a custom form and a BrightWork 365 upgrade contains changes to the original out of the box version of that form, the new changes will need to be manually applied to your custom form.
- If you need to add a new column to a form, in order to avoid app upgrade complications, we strongly recommend adding it to a new form section of your own rather than editing an out of the box form section.
- These instructions are assuming a first-time customization of a form. If you are now editing a previously customized form, alter these instructions as necessary.
Add a Column to a Form
In order to properly add a new form column, you will first need to create a new form rather than modify an existing out of the box form.
- Navigate to the unmanaged solution in your dev environment that you use for customizations.
- In the Power Apps solution editor add the existing table that contains the form to be modified, e.g., Project.
- Add the relevant original out of the box form that will be used as the basis for your new form.
- Load the original form.
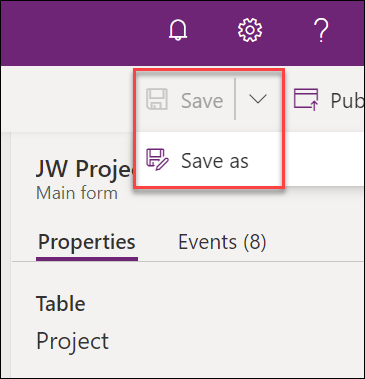
- Using Save as, save the original form as a new form that will be used for modification; do not edit the original form.
- Copy the GUID of your modified form. The form GUID can be obtained from the URL of the Power Platform edit page of the form. See this example of the form GUID (the highlighted portion only): https://make.preview.powerapps.com/e/123456abcd/entity/bw_request/form/edit/65432gfiul-00987f1?source=powerappsportal.
- Click Component.
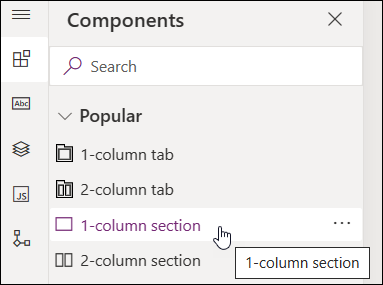
- Click on the existing tab that you would like the new section to be added to.
- On the Components list select the section style you'd like to add to your form.
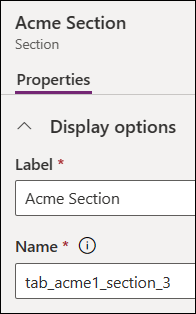
- Click on the new section and edit the section's Label value and Name value.
- Modify the new section's content as needed (add fields, etc.).
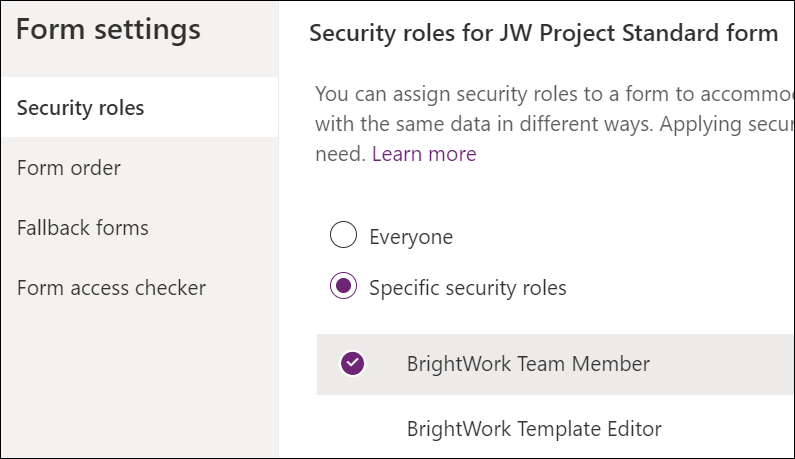
- In Form settings at the top of the editor, change the Security roles of the form to include at least the roles of BrightWork Team Member, System Administrator, and System Customizer. Click Save and publish.
- Save the form, Publish the form, and exit to the solution screen.
- Remove the original form that was previously copied to your custom unmanaged solution (the unmanaged solution should be as clean as possible) and exit to the environment screen.
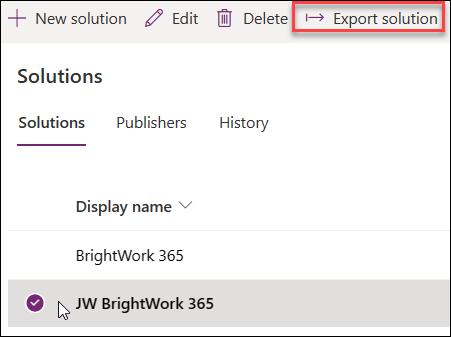
- Export your customized unmanaged solution; be sure to Publish the form as part of the export process.
- Import the managed solution into the relevant environment as described in the Customization Notes article.
Note: We generally recommend skipping the check for issues during export since you will be presented with many non-problematic issues that can be ignored. - In the BrightWork 365 app, use the Area switcher at the bottom left of the screen to switch to the Templates area (for BrightWork versions earlier than v1.6, switch to Admin area > Forms). In the Form Templates list add a new row by clicking + New at the top of the page, and add all required fields including the previously copied Form GUID.


The newly created form can then be chosen in a template's Details tab. The associated Form GUID will automatically populate after a short wait.

